Smart home technology can make a home more convenient to live in, more energy efficient, safer, and much more. But, if you just go around replacing all of the existing appliances, switches, lights, and window coverings with new smart products, then you are also probably adding a lot of otherwise functional products into a landfill. Fortunately, there are many smart products available that, instead of replacing your existing dumb devices, simply add smart capabilities to them.
One thing to consider, before purchasing any product to make your home smart, is how that product will integrate with other smart products in your home. For example, for added safety, you may want to trigger a smart pathway light to turn on in response to a smart motion detector being triggered by a person moving through the house at night. This could prevent a late-night visit to the emergency room after you trip over a toy that didn’t get put away.
Some manufacturers publish their application programming interface (API) to allow third parties to create “integrations” so their products can work with products manufactured by other companies. Other manufacturers take a much more proprietary attitude. They may build a great many features into their products, but they may not be able to communicate with products manufactured by other companies. Or, their products may only work with ones manufactured by a few “trusted” partners.
More from Jay: How the Everything Set Box Handles Smart Home Network Security
Building a smart home takes some upfront research and planning so you don’t choose products that, in the long run, limit the capabilities that you want to build into your home.
Making Your Existing Locks Smart
Smart locks can offer an added degree of convenience and security for homeowners. For one thing, you never have to worry about making sure you remembered to lock your doors when leaving the home or at night. You also never have to worry about locking yourself out of your home unless you ignore the smart lock’s warnings to change your batteries.
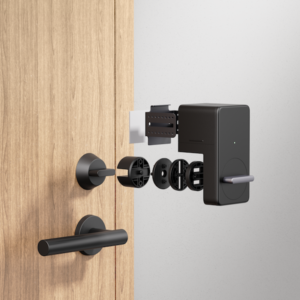
SwitchBot, whose products will be mentioned throughout this article, specializes in creating products that retrofit your existing products with smart features. The SwitchBot Lock can be used to convert an existing deadbolt lock into a smart lock. It is easy to install and offers a wide range of features. For example, SwitchBot offers nine different methods for unlocking a door outfitted with the SwitchBot lock:
- SwitchBot App control (Device can be unlocked using the free SwitchBot app when within Bluetooth range)
- Scanning a SwitchBot NFC Tag with your smart phone. SwitchBot includes two NFC tags with each lock.
- Numerical Code entry using an optional SwitchBot Keypad or SwitchBot Keypad Touch
- Fingerprint scan using an optional SwitchBot Keypad Touch
- Widget for iOS and Android
- Apple Watch
- Unlocking using the lock’s original key
- Using third-party voice assistants and services
- An open API allowing developers to independently write software drivers to integrate the operation of the SwitchBot Lock with different smart home platforms
The SwitchBot Lock offers a number of additional important features:
- Smart phone notifications when the lock is opened, locked, or when the door is left ajar.
- Long Battery Life – The batteries in the SwitchBot Lock are expected to last 6 months under normal use. Notifications are sent when it is time to change the batteries
- Event log that includes entries each time the lock was locked / unlocked
- The ability to remotely lock / unlock the SwitchBot lock using the SwitchBot app when a SwitchBot hub is installed
- The ability to lock and unlock using voice commands (unlocking requires a code)
- Automatic timed locking after the lock is unlocked
I had a chance to try the SwitchBot Lock. The first step is to validate that the SwitchBot Lock is compatible with the deadbolt lock installed in your home. SwitchBot makes this easy using a tool on their website available here. Installation is also very simple. Included in the box are adapters to fit the SwitchBot lock to a wide variety of deadbolt locks. Once the proper adapter is fitted to the SwitchBot lock, the basic steps to installing the SwitchBot lock are:
- Clean the surface of the door where the SwitchBot Lock will be attached
- Adjust the base to accommodate the depth of your lock using the included screwdriver
- Check that your lock operates smoothly with the SwitchBot Lock held in place
- Adhere the SwitchBot Lock to your door using the included self-stick pad
- Install a small magnet on your door frame adjacent to the SwitchBot Lock. This is used to sense if the door has been left ajar
- Add the SwitchBot Lock to the SwitchBot app
- Calibrate the SwitchBot lock by following the procedure in the app so it knows how far to turn the knob on your lock to lock/unlock it
SwitchBot provides a video that demonstrates the entire process. That video can be found here.
The SwitchBot Lock works very well. The wide range of options for locking/unlocking the lock will meet any user’s needs. However, one thing that someone planning to install the SwitchBot lock should do is to make sure that their deadbolt lock operates smoothly before proceeding with the installation. If the deadbolt rubs against the strike plate, then there may be too much friction, and the SwitchBot Lock’s battery-operated motor won’t be able to operate the lock. A little work with a file on the strike plate can easily address this issue.
SwitchBot also provided me with a SwitchBot Keypad Touch for this lock. This was also easy to install. After installing batteries, you add it as a device in the SwitchBot app, give it a name, and pair it with the SwitchBot Lock. The app then walks you through instructions for mounting the keypad using either the included screws or double stick pad.
Once the installation process is complete, you can configure the SwitchBot Keypad Touch to be operated through six to 12-digit passcodes, fingerprints, and NFC Cards (the SwitchBot Keypad Touch comes with one card). Passcodes can either be:
- Permanent – Designed to be used by family members
- Temporary – For house guests. The passcode expires after a period of time.
- One-time Code – Expires after a single use. Useful for contractors our guests coming to a party
- Emergency – For family members to use during duress. Sends a notification to all other family members
Again, the keypad touch offers plenty of options for users.
When coupled with a SwitchBot Hub Mini, SwitchBot offers a number of paths to integrate their products with different smart home ecosystems. Integration with Google Assistant, Amazon Alexa, IFTTT, and Siri Shortcuts can be enabled through the SwitchBot App. SwitchBot also offers an open API that software developers can use to integrate SwitchBot products with the smart home platform of their choice. I wrote a Crestron-SwitchBot driver some time ago. An updated version of this driver that supports the SwitchBot Lock is currently being tested and should be available soon. This driver can be downloaded from my GitHub here.
An alternative to the SwitchBot Lock is the Kwikset Convert. It works with SmartThings, Amazon Alexa, and Home Connect.
It is also worth mentioning the August WiFi Smart Lock. The design of the August lock only requires you to discard the back plate and knob of your existing deadbolt lock, so you don’t have to throw away the whole lock, only a small portion of it. The August WiFi Smart Lock is compatible with all the major voice assistants and a wide range of professional and consumer smart home platforms.
Turning Dumb Devices On/Off
The easiest way to turn a device on/off is with a smart plug. There are more smart plugs than you can count on the market today. However, many are very cheap and probably won’t be a good investment. You are better off paying a little more and purchasing smart plugs from a reputable manufacturer with products that have been approved by UL, or another standards organization.
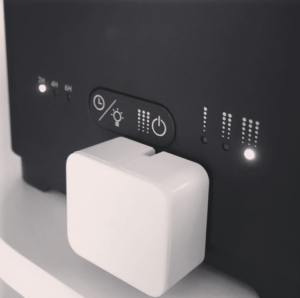
But, not every electrically operated device in your home can be made smart by switching it on/off with a smart plug because many devices have to be operated by pushing a button. The SwitchBot Bot was released over five years ago and continues to be a simple solution for controlling almost any device that is operated by a button. This small, battery-powered motorized actuator is attached to an appliance using a double-stick pad. Then, it is controlled through the SwitchBot app over Bluetooth.
The SwitchBot Bot is also compatible with Alexa, Google Home, and HomePod. With the addition of a SwitchBot Hub Mini, the SwitchBot Bot can be controlled through IFTTT or integrated with other smart home platforms through the SwitchBot Cloud API. Using this API, I’ve written a driver to control the SwitchBot Bot, along with some of SwitchBot’s other products, from a Crestron smart home processor. This Crestron driver can be downloaded from my GitHub.
Making Your Lights Smart
Smart lighting can add both convenience and safety to a home. All the lights can be turned off with a voice command when you go to bed, so you don’t have to walk from room to room turning off lights that were left on. At night, pathway lights can be lit in response to motion sensors to make it safer to walk around your home. Lights can automatically be turned on in the event of a fire, or other emergency to make it easier for family members to safely exit the home. Also, exterior lights can be flashed in the event of an emergency to make it easier for first responders to locate your home.
The primary way that people make their lights smart is to either replace their existing wall switches with smart switches/dimmers or to replace their light bulbs with smart bulbs. However, both of these approaches create waste in a landfill.
One way to make your lights smart, though this may not be viewed as the most aesthetically pleasing approach, is to use a SwitchBot Bot to operate the light switch. The SwitchBot Bot comes with a self-stick pad that tethers the switch to the device’s actuator arm, so a single SwitchBot Bot can turn a light switch on and off.
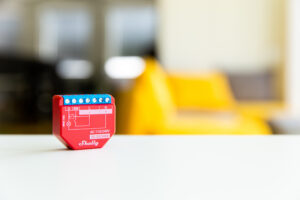
Another way of making a light smart, though it does require some DIY electrical skills, is to use one of the small relays or dimmers manufactured by Shelly. Shelly makes very small IoT relays and dimmers that can be placed inside the electrical box, behind an existing light switch, totally hidden from view. These IoT devices are wired to both the lighting load that you want to make smart and the existing switch.
The existing light switch can continue to operate the connected light. In addition, the light can now be independently controlled through the Shelly app and a wide range of smart home ecosystems including Alexa, Google Home, Hubitat, Home Assistant, and many more consumer, and professional, smart home platforms through their API. Using this API, I’ve written a driver to control Shelly products from a Crestron smart home processor that can be downloaded from my GitHub.
Making Your Window Coverings Smart
There is something magical about automating the operation of blinds, shades, and drapes in a smart home. Closing smart window coverings in the summer, when the sun is shining directly into a window, can keep your home cooler and save a significant amount of money on air conditioning. In the winter, allowing the sun to shine directly through windows can help heat a home. Closing window coverings at other times during the winter can help to insulate windows against heat loss.
Daylight harvesting is the term for opening window coverings during the day to allow the sun to provide light in a room and eliminate the need to turn on electrical lights. During the summer, if this is only done when the sun is not directly shining into a window, this eliminates the issue of heat gain from the sun causing the cost of air conditioning a home to go up. Smart window coverings can also be automatically closed when you leave home or at nightfall for added security and privacy. In the event of a fire, or other emergency, smart window coverings can be opened to allow first responders to have easier access to a home.
However, replacing existing window coverings with smart ones is wasteful and, because window coverings are a décor item, expensive. Fortunately, there are less expensive add-on devices to make your existing window coverings smart.
The Current Products E-Wand and Sunsa Wand both operate by replacing the control wand on mini blinds with a battery powered, motorized version. The E-Wand is a Zigbee device, while the Sunsa Wand connects directly to your home’s Wi-Fi network (Sunsa has published an API for third-party integration). These products work with any size mini blinds, including blinds with small one-inch slats. As I already noted, these products do require that you replace the control wand on your blinds to make them smart. However, that produces only minimal waste compared to throwing away the entire blind.
There are additional options for automating the operation of larger 2-inch blinds. The Tilt, by My Smart Blinds, and the Somfy Clever Tilt Blind Motorization Kit can be used to make existing 2-inch blinds smart. Both require the installation of a smart motor inside the blind’s header; where it is completely invisible. One difference between the two products is that the Somfy Clever Tilt Blind Motor uses a rechargeable battery while the My Smart Blinds Tilt system uses a solar panel to keep an internal battery charged. A second difference is that Somfy offers a wide range of integration solutions for their products while My Smart Blinds does not. Some people have solved this by reverse engineering the communications between the My Smart Blinds app and the Tilt, but there isn’t a supported public API for integration with third-party system.
The upcoming SwitchBot Blind Tilt (currently on Kickstarter) also attaches to your blinds and then uses your old control wand as a way to trigger the opening/closing of your blinds. Like other SwitchBot products, it can be operated using the SwitchBot app and integrated with other SwitchBot products, such as the SwitchBot Tag (NFC tag) and the SwitchBot Meter (temperature and humidity sensor). To integrate with Alexa and other smart home ecosystems requires a SwitchBot Hub Mini.
My Smart Blinds and RollerTrol offer solutions for automating roller shades. A smart motor is installed inside the tube that your shade rolls on/off of during operation. Like the My Smart Blinds Tilt, the company’s shade motors are solar powered. RollerTrol offers a rechargeable lithium-ion battery pack for powering their shade motors. The RollerTrol shade motor is powered by 12 VDC so they can also be powered using a compatible power supply.
Again, like the My Smart Blinds Tilt, My Smart Blinds doesn’t offer integration with third-party smart home platforms. On the other hand, RollerTrol’s shade motors can be integrated with third-party, smart home, ecosystems using the Broadlink RM4 Pro hub. Adrian Biffen has written an excellent article on the process of integrating products connected to a Broadlink RM4 hub with Alexa. That article can be found here.
Alternatively, if your shade is operated by a continuous loop chain, there are kits available from Soma and RYSE that clamp onto the chain to automate the shades operation. Soma offers a published API and integration with a wide range of smart home platforms. RYSE offers integration with Apple HomeKit, Amazon Alexa, and Google Assistant.
Finally, if you have a curtain that is hung on a rod, U-rail, or I-rail, SwitchBot also manufactures the SwitchBot Curtain and SwitchBot Curtain Rod 2. These are small, smart robots that operate by pushing your curtain back and forth across the rod, or rail, that the curtain is hung from.
Making Your Ceiling Fans Smart
A ceiling fan can be leveraged as a first stage of cooling in your home. The U.S. Department of Energy recommends that to balance energy savings and comfort, a thermostat should be set to 78 degrees Fahrenheit for air conditioning. Instead, you can turn on a ceiling fan when the temperature reaches 78 degrees Fahrenheit, raise the cooling set point of your air conditioner to 82 degrees Fahrenheit, and still be comfortable. Because a ceiling fan uses 1% of the energy of an air conditioner, you can save up to 12% on the cost of cooling your home using this technique. However, to implement this you need a smart ceiling fan.
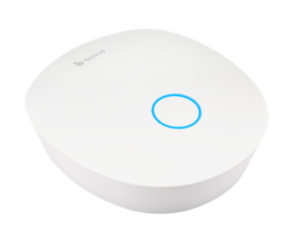
If you have a ceiling fan that can be operated by a handheld remote control, then it can probably be turned into a smart fan using the Bond Bridge. The Bond Bridge is easy to setup and acts as a bridge between the ceiling fan and a home’s Wi-Fi network.
The ceiling fan can then be integrated with Alexa, Google Home, SmartThings, and other smart home ecosystems through the Bond Bridge API. Leveraging the API, I’ve written a driver to allow a Bond Bridge to be integrated with a Crestron smart home processor. That driver can be downloaded from my GitHub.
Making Your Garage Door Smart
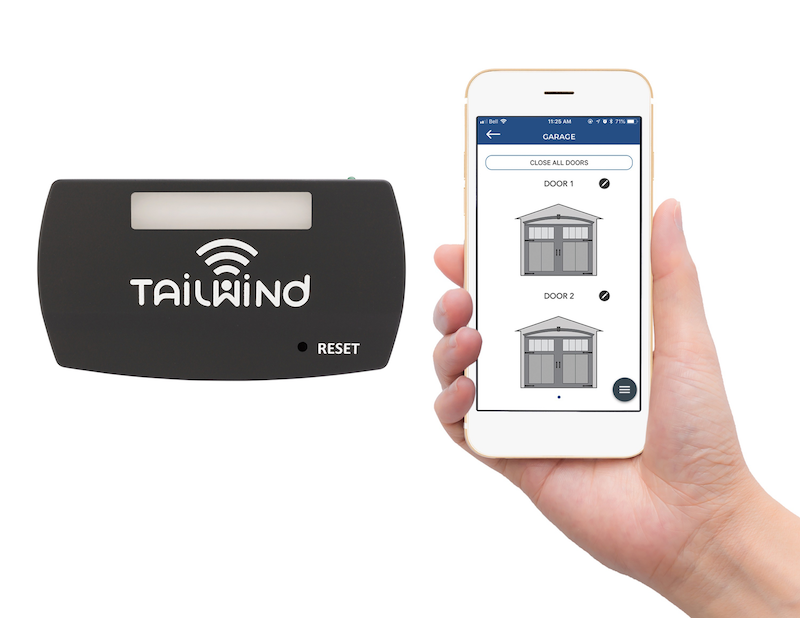
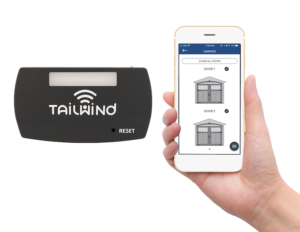
Nobody wants to drive away on a trip and forget to close their garage door or forget to close their garage door when they come home at night. A smart garage controller from Tailwind or MyQ can solve these issues and much more. These smart garage controllers can be integrated with almost any garage door opener to convert it into a smart opener.
Tailwind offers integration with a wide variety of smart home platforms and has a published an API that I used to create a Crestron smart home driver, which can be downloaded from my GitHub. MyQ has partnerships with specific manufacturers, including Alarm.com, Ring, and Vivint, to name a few. However, they don’t have an API and only offer smart home integration with select partners.
Making Your Thermostats Smart
Unfortunately, the only way I’m aware of to make a standard heating and air conditioning system smart is to replace the thermostat with a smart one. However, the fact you have to throw away your old thermostat shouldn’t stop you from buying a smart thermostat because the energy savings offered by a smart thermostat can more than compensate for that act. Be aware that some old thermostats have mercury in them, so care should be taken in how you dispose of them.
On the other hand, if you have a mini-split heat pump system, or a window air conditioner that is operated by a remote control, products from Sensibo and Ambi Climate may be able to convert it into a smart system. Both companies offer tools on their web sites to check if your mini-split system, or air conditioner, is compatible with their products. Both companies offer a wide range of smart home integration options and published APIs. I’ve written a Crestron integration driver for each. The Sensibo driver can be downloaded from my GitHub here and the Ambi Climate here.
There are a wide range of products available that can convert the existing products and appliances in your home into smart devices. Some are not nearly as aesthetically pleasing as a direct smart replacement, but they can keep a lot of dumb products from cluttering up landfills.


