Motorized windows that are integrated with a smart home processor/hub can add value to a home by improving the health of family members, lowering utility bills, adding convenience, and improving security.
There are a number of different solutions for opening and closing windows under the control of a smart home processor/hub, but each solution requires wiring to supply power to the device. Another thing to keep in mind is that motorizing windows is not inexpensive; at a minimum you are going to spend several hundred dollars for the necessary hardware to motorize a single window.
Truth Hardware
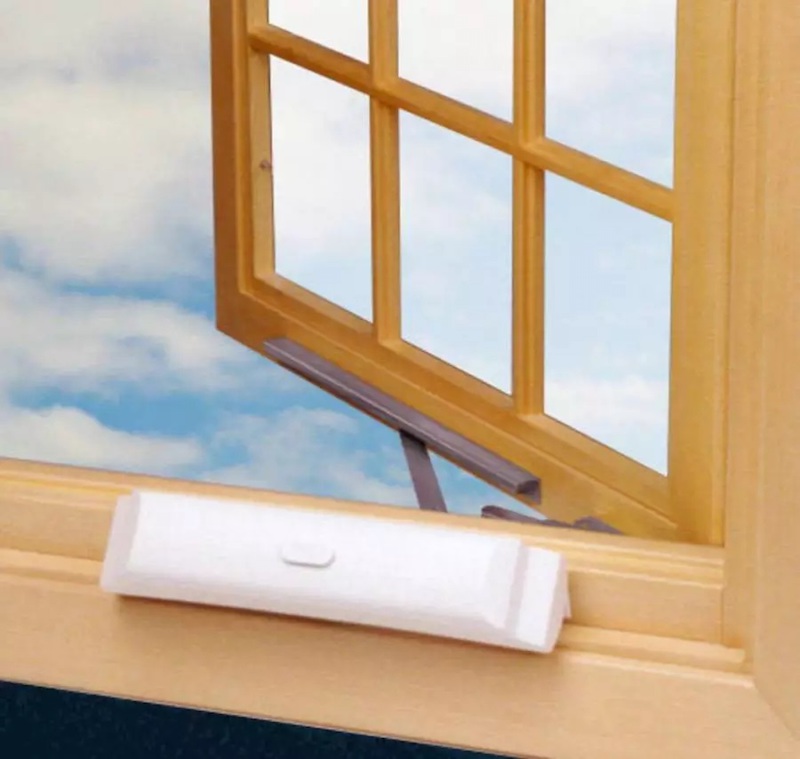
If you have a window that is operated by a crank handle (typically a casement window, awning window, or possibly a light weight skylight) then a simple solution for automating the operation of the window is the Truth Hardware Sentry II WLS Power Window System. This system comes with everything you need to motorize a window, with the exception of the wire to connect everything and a paintable plastic cover for the motor assembly to make the installation more aesthetically pleasing (Why Truth Hardware makes you purchase this inexpensive piece of plastic separately is a mystery to me). The system even includes a rain sensor that can be used to automatically close the window if it starts raining.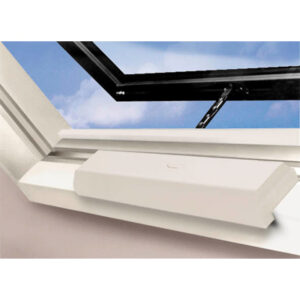
The system incorporates some key safety features, such as an interlock cable connected to the window screen. If the screen is removed from the window the operation of the motor is disabled. The system also can sense an obstruction and automatically reverses the direction of the motor
The Sentry II WLS Power Window System comes with a controller that is mounted in a cutout in a wall. The controller includes buttons for opening and closing the window as well as opening and closing a 24-volt motorized window treatment. The controller also can be wired to up to two motorized window locks, so the window is automatically unlocked before it is opened and locked when it is closed. For added convenience, the system is powered by 120 VAC and doesn’t require a separate power supply. An optional hand-held, wireless, remote control is also available.
The system can easily be integrated with a smart home processor/hub. There are contact closure inputs on the controller that will trigger opening and closing of the window. There is also an output that defines the open/close status of the window, so true feedback is provided to the smart home system. For example, if your smart home is controlled by a Crestron smart home processor, then these can be tied to the processor’s relays and one of its digital I/O ports. For smart home hubs that don’t have these ports, a pair of Shelly Plus 1 IoT relays could be used for both control and to monitor the status of the window.
Shelly IoT products integrate with a wide variety of smart home platforms, including Alexa, Google Home, SmartThings, Hubitat, Home Assistant, Control4 (using the driver written by Chowmain Software) Homey, and Hoobs. I’ve also written a free driver to integrate Shelly products with a Crestron smart home system so they could be used if it would be difficult to run a wire between the window controller and a Crestron processor. The Crestron-Shelly driver can be downloaded here.
Installation of the Sentry II WLS Power Window System is more difficult than it should be due to the challenge of working with the wire connectors on the controller’s circuit board. These are difficult to reach and undersized for the gauge of wire needed for many installations. The manufacturer recommends 18 AWG wire if the motor is within 50 feet of the controller, 14 AWG wire if the distance is 50-100 feet, and 12 AWG wire if the distance is 100-150 feet. The absolute maximum wire size that I found could be fit into the wire connectors in the controller was 18 AWG, making installation problematic for many people.
Truth Hardware does provide detailed instructions for installing the product. A downloadable version of the instructions is available here.
So, while fairly expensive (most online prices I found seem to run around $900), and a bit challenging to wire properly, the Truth Hardware Sentry II WLS Power Window System is a full featured window motorization solution. It reduces the overall complexity of motorizing a window and includes all the safety features a homeowner could want.
The Truth Hardware Sentry II HS Power Window System is identical to what I have described above except that it is specifically designed to motorize large skylights. The system includes the same controller box, rain sensor, etc. that is included with the WLS system. However, instead of the motor used in the WLS system, it includes a linear chain actuator that is capable of lifting a 160-pound skylight (80 pounds of weight on the chain drive and 80 pounds of weight on the skylight’s hinges). A linear actuator is a motorized system that creates motion in a straight line. A linear chain actuator drives a semi-rigid chain that can push a window open or pull it closed.
Again, this Truth Hardware system is fairly expensive (online prices are a few hundred dollars more than the WLS system described above), but other than the wiring challenges described above, it provides a full-featured system that reduces the overall complexity of motorizing a window.
RollerTrol
RollerTrol offers a selection of linear actuators and accessories for motorizing the operation of different types of windows. These include:
- Linear Chain Actuators that can be operated by radio frequency (RF) remote control, a wall mounted switch, or Z-Wave. RollerTrol offers a standard actuator and an HD model for heavy windows. They can be used to automate the operation of skylights, casement windows, awning windows, and hopper windows.
- Threaded screw actuator to motorize the operation of slider, single hung, and double hung windows. This type of actuator utilizes a motor that spins a threaded rod. An arm attached to the rod is then moved linearly along the side of the actuator. These actuators are custom made by RollerTrol to travel the distance necessary to open/close the specific window being automated. They can also operate in pairs for heavy, vertically hung, windows.
- Power Supplies – RollerTrol’s actuators are all powered by 12 VDC. RollerTrol offers a variety of different power supplies to provide power to one, or more, of their linear actuators.
- Rechargeable battery that can act as a battery backup during a power outage
- Integration – First, RollerTrol sells a Z-Wave interface that allows their linear actuators to be controlled by a wide range of smart home hubs. RollerTrol also resells the BroadLink RM4 Pro IR/RF Wi-Fi Smart Hub. This device is capable of learning the RF signals that control an actuator and make them available over Wi-Fi using the BroadLink smart phone app, Alexa, and Google Assistant. However, the BroadLink protocol is very complex, and I have not found any drivers to integrate it with third-party smart home platforms except if an Android device running a software app called RM Bridge is used. I believe, but have not tested it, that the Bond Bridge could also be used to learn the RollerTrol RF commands to control their actuators. The Bond Bridge would then allow the actuators to be integrated into a wide variety of smart home platforms, including SmartThings, Hubitat, Home Assistant, Control4 (using a driver written by Chowmain Software), and Crestron (using the free Bond Bridge driver that I wrote; available here).
One thing you should keep in mind if you are going to use a linear chain actuator to open and close a skylight, casement window, or awning window is that the window screen is typically located on the inside of these windows. To connect the linear actuator’s chain to the window, you are going to have to cut a hole in the window screen for the chain to pass through. In addition, because the angle of the window changes as it is opened, the hole for the chain is going to be larger than the cross section of the chain itself. This creates an opening for insects to enter a home when the window is open. I spoke to the people at RollerTrol about this and their suggestion was to create a “horse hair” hole in the screen. This involves cutting a hole in the screen that is smaller than the cross section of the chain and unweaving strands of the screen around the hole to enlarge it to the needed size. The strands will then rub against the chain as it moves and create a seal that keeps insects out.
Had I known about this solution a number of years ago, I might have saved some money and chosen a linear actuator to automate the operation of an awning window in my own home instead of using a Truth Hardware Sentry II WLS Power Window System.
RollerTrol offers reasonably easy to use solutions for automating the operation of a wide variety of windows using linear actuators. There is more “DIY” knowledge required to install their products, compared to the complete systems offered by Truth Hardware. To help homeowners, however, RollerTrol has a good deal of information on their web site. This includes an article that describes automating the operation of a window using their products. That article can be found here.
The linear actuators and required accessories sold by RollerTrol are less expensive than the products offered by Truth Hardware. However, you are going to have to come up with your own solutions for controlling window treatments in coordination with the opening/closing of windows; locking/unlocking motorized window locks if your window includes them; closing windows in the event of rain; and adding some of the safety features built into the products from Truth Hardware.
DIY
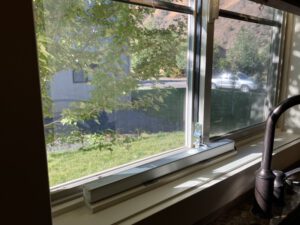
It isn’t difficult to motorize a window yourself. I went through the process for this article, so I could accurately explain it. The window I motorized is a slider window, and therefore I chose a threaded screw actuator for the project.
The first thing to understand about a basic linear actuator is that it is controlled by the polarity of the DC voltage being supplied to it. If you provide the DC voltage in one polarity it will move the actuator in one direction. If you reverse the polarity and provide the same voltage to the actuator, then it will move the actuator in the opposite direction. So, for full control of a linear actuator, you need to supply DC voltage in both polarities along with the ability to turn off the power to halt the actuator’s movement. The actuator I chose includes limit switches so it will automatically stop when it reaches the limits of its travel. This simplified the design.
Because they are so easy to integrate with a wide variety of smart home platforms, I chose to use Shelly products for the integration. In addition, I purchased an inexpensive four-channel relay board from Amazon, and a 24 VDC power supply from Amazon. I selected 24 VDC for this project because it could be used to power the Shelly devices, the 4-channel relay board, and a wide selection of linear actuators.
The relays on the four-channel board are controlled in pairs by a Shelly Plus 2PM. I also used a Shelly Plus 1PM to measure the power being consumed by the hardware. So, for safety, I could detect if the window was obstructed.
Unfortunately, on a slider window, the window screen is on the outside of the window, so I wasn’t able to include a safety interlock that deactivated the operation of the linear actuator if the screen was removed.
Searching online I found a 24 VDC, threaded screw, actuator manufactured by Soon Industrial in Taiwan. Their online store made it easy to order, and they have detailed installation instructions available online here. Cost for the actuator was just over $100, though there was an additional charge of $100 for shipping.
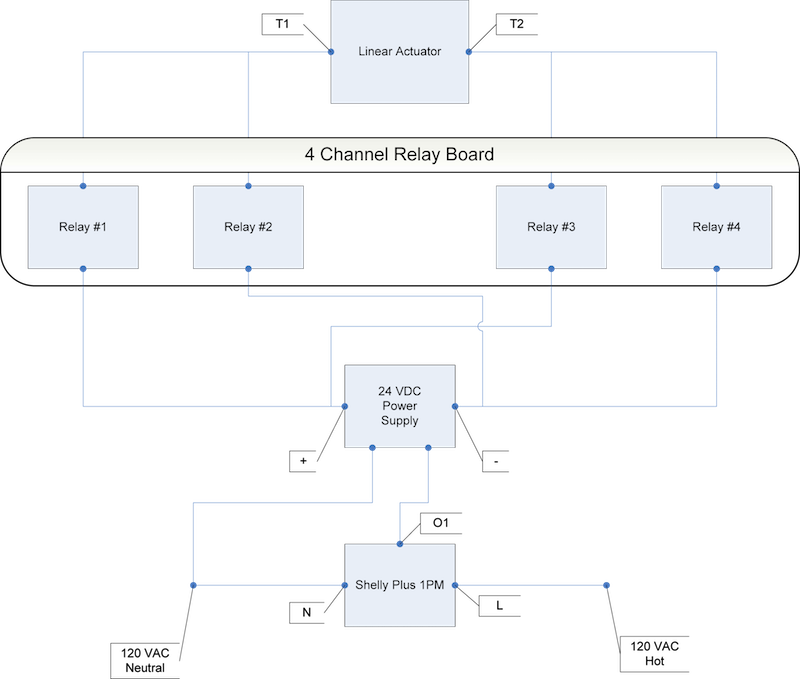
The above block diagram shows the basics of how I wired the controller. As shown in the block diagram, if relays #1 and #4 are closed, then +24 VDC is sent to the T1 terminal of the linear actuator and the T2 terminal of the actuator is connected to the power supply’s negative terminal. Alternatively, when relays #2 and #3 are closed, +24 VDC is sent to terminal T2 of the linear actuator and the T1 terminal of the linear actuator is connected to the power supply’s negative terminal. To stop movement of the threaded screw actuator all four relays are opened.
It is also very important to understand that if you were, for example, to close relays #1 and #2 at the same time you would create a short circuit. The same thing would occur if you were to close relays #3 and #4 at the same time. So, I took great care to only operate relays #1 and #4 together and relays #2 and #3 together.
To make this foolproof I used the ability to add custom functionality to a Shelly Plus, or Pro, device with JavaScript. I wrote scripts that would accept custom commands. This minimized the number of http commands I had to send to the Shelly devices; which sped up the response time to commands and simplified the code I had to write for my Crestron smart home processor. The commands implemented by the scripts included:
- Open the Window – Make sure all four relays were open and then close relays #1 and #4 to move the actuator in one direction
- Close the Window – Make sure all four relays were open and then close relays #2 and #3 to move the actuator in the opposite direction
- Stop the Window – Open all four relays to stop the movement of the actuator
I monitored the power consumed by the 24 VDC power supply using a Shelly Plus 1PM. First, I measured the amount of power consumed during normal operation. Then I wrote a script that monitored the power used. If the power consumed by the 24 VDC power supply rises by 10 percent, then the script will send a command to the Shelly Plus 2PM to immediately open all four relays and stop the window. For an additional level of safety, I also have a notification sent to my smart phone if something is jammed the window.
A Crestron example program that demonstrates the control of the window, along with the JavaScript scripts for the Shelly Plus 1 and 2 PMs, can be found on my GitHub here.
Scripting
First, I want to thank Lyubomir Petrov at Shelly for all his patience and help. When I worked on this project scripting was very new, not fully documented, and required the use of beta firmware on the Shelly devices. Lyubomir’s assistance was invaluable in helping me successfully write my first scripts on the Shelly Plus 1PM and Plus 2PM.
Shelly’s inclusion of JavaScript in the Plus and Pro lines of their products allowed me to convert the Shelly Plus 1PM and Plus 2PM from generic relays with power monitoring into specialized hardware for window control. I expect that other people will also find uses for JavaScript to customize Shelly hardware for their own projects.
You can find a tutorial and documentation on the scripting capabilities that Shelly has included in their products here. Experienced JavaScript programmers will find the environment somewhat limited. Shelly is using the mJS microcontroller JavaScript engine. The engine has limited functionality to keep it small, and fast. However, it is easy to use to customize a Shelly device. For example, to have the Shelly device accept a custom http command the code would look like this:
function Open(request, response)
{
print(“Executing function open”);
//Do something
response.code = 200;
response.send();
}
HTTPServer.registerEndpoint(“open”, Open);
Then sending the following http command would run the script:
http://<IP Address of Shelly Device>/script/1/open
Or, to turn output 1 on a Shelly Plus 2PM on the code would look like this:
Shelly.call(“Switch.set”, {“id”: 0, “on”: true}, null);
The JavaScript environment includes support for numbers, strings, arrays, objects, JSON, timers, event handlers, and more. However, in some cases you may run across limitations that can be a little frustrating. For example, in one of the scripts that I wrote I needed to convert a string that contained a number into an actual number. Unfortunately, the mJS environment doesn’t directly support any of the common ways of converting a numerical string to a number. Instead I had to write code similar to this:
let s = “1234”;
let num = 0;
for (i = 0; i < s.length; i++)
{
num = (num * 10) + (s.at(i) – 48);
}
I was glad I only had to convert integers and not floating-point values.
One area of scripting that didn’t work as well as I would have liked was the ability to trigger an action when the power being measured by the Shelly Plus 1PM exceeded a predefined threshold. To do this, I had to use a timer that triggered the code that measured the power consumption every two tenths of a second. Even though the timer runs every two tenths of a second, by the time I requested a power measurement, compared it to my threshold, sent an http command to the Shelly Plus 2PM, and the Shelly Plus 2PM acted on the http command to stop the movement of the linear actuator, a full second would elapse. To really protect someone who caught their hand in a closing window, the response time should be shorter. I do wish Shelly had a way to implement code, that is executing a human safety feature, as a high priority event.
Summary
Automating the operation of windows can provide real value in a smart home. They can provide health benefits for the homeowners and their family, added convenience, and potentially a significant saving compared to the cost of running an air conditioner. However, motorized window solutions are fairly expensive and require the assistance of an electrician, or professional smart home integrator, to assist with the installation.


