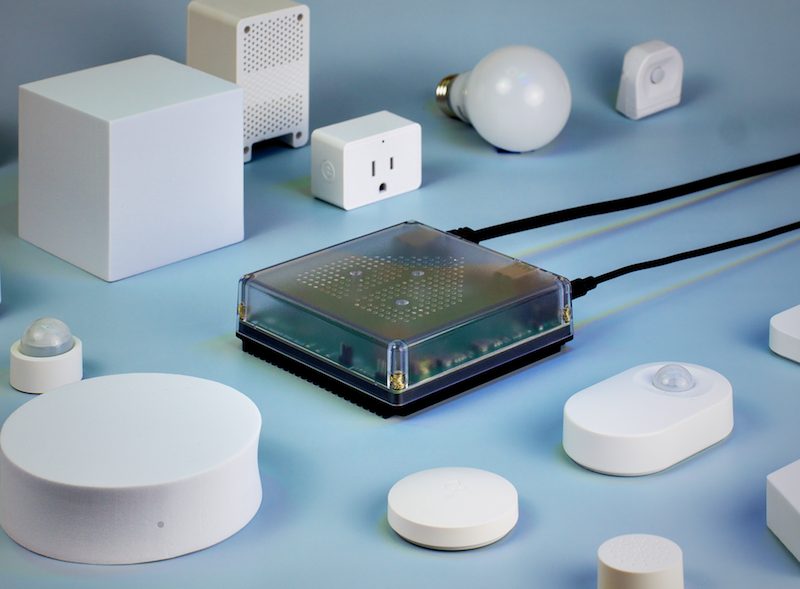
Home Assistant (HA) is an open-source home automation system supported by a worldwide community of smart home hobbyists. HA focuses on privacy and, like professional smart home systems, controls smart home accessories locally. And again, like professional smart home systems, it can operate without a connection to the internet.
The work to develop HA was started by Paulus Schoutsen in 2013. From that humble beginning, HA has grown dramatically in popularity. In 2021 the number of HA installations passed the 100,000 mark and today there are over 250,000 installations.
HA is under the umbrella of the Open Home Foundation, which “fights for the fundamental principles of privacy, choice, and sustainability for smart homes. And for every person who lives in one. It does this by supporting the development of open-source projects, and open connectivity and communication standards… The Open Home Foundation owns and governs over 240 open-source projects, standards, drivers, and libraries.” This includes Home Assistant.
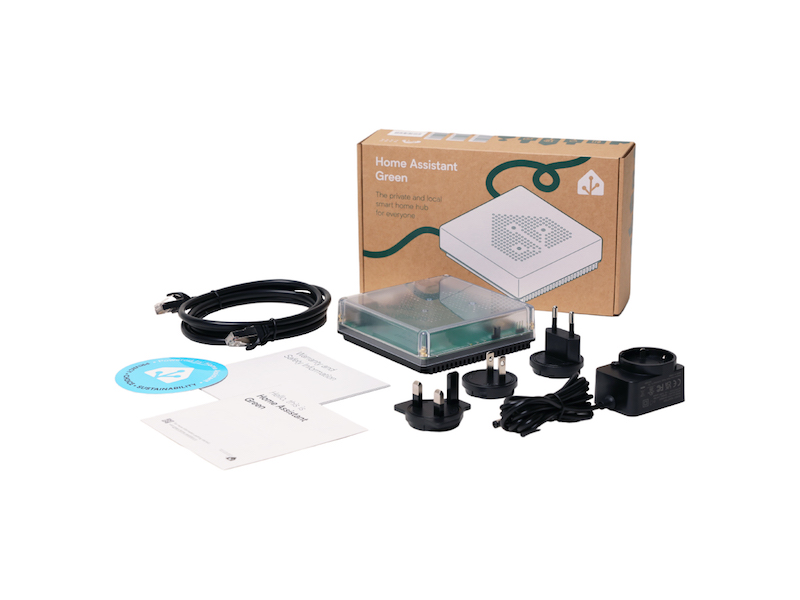
However, while HA has been the favorite for many smart home hobbyists, the DIY nature of the product has kept it from going truly mainstream. As a step to overcome this, Nubu Casa and Seeed Studio developed the Home Assistant Green smart home hub, a fully plug-and-play version of HA with the HA software preloaded onto a hardware platform.
Setting Up HA Green
Prior to the release of HA Green, setting up HA began with the purchase of a compatible hardware platform. Next you would either install your favorite Linux distro onto your hardware followed by the HA software or HAOS, which is the HA software combined with an operating system for your hardware. Alternatively, you can install HA on an old PC as described in this XDA article. Either of these options could be a daunting task for the average person without a technical background.
HA Green completely simplifies this process. The steps required to set up an HA Green smart home hub are as follows:
- Plug the HA Green smart home hub into your router with the included Ethernet cable
- Power the HA Green smart home hub with the included power supply
- Access the HA system using your internet browser
- You will see a message displayed saying, “Starting up, this could take up to 20 minutes.”
- Eventually, a welcome message is displayed with a button to press that is labeled “Create my smart home.”
- Next, you will be prompted to create your user account, enter the address of your installation, and accept or reject the option to share anonymized information.
- Finally, you will be shown all the smart home devices that HA has found connected to your home network. These devices can become the foundation of your smart home.
At this point, you are up and running and ready to start connecting the devices that HA found to your system, allowing you to create your overall smart home.
What Isn’t Included with HA Green
HA Green provides a great deal, but it doesn’t include everything you might want for your smart home. Zigbee and Z-Wave are two major wireless protocols that manufacturers of smart home devices use for connectivity between their products and smart home hubs. For example, out of the box, HA Green doesn’t include radios to communicate with Zigbee or Z-Wave devices.
Fortunately, this issue can be easily addressed with third-party radios. Inexpensive USB sticks can be plugged into the HA Green platform to enable communication with Zigbee and Z-Wave devices. This does, however, add to the expense of the installation.

For people that want to use HA as their smart home platform, a second limitation is that connectivity to Amazon Alexa or Google Home voice assistants requires a monthly subscription ($6.50 per month or $65 per year) to support the cloud service that is required to provide this integration. This cost is understandable since most HA users purchase their own hardware and download the HA software for free. However, for people purchasing HA Green, this is a sharp contrast to a Hubitat Elevation hub where the cost of the cloud service required to integrate these voice assistants has been built into the cost of the hardware.
If you are just planning on using HA as a gateway between the world of IoT smart home devices and a Crestron professional smart home platform, then this may not be an issue for you.
To be fair, there are technical workarounds that eliminate the requirement to pay a subscription to integrate a voice assistant. However, these are technically complex to implement and negate the simplicity that HA Green offers users.
Integrating HA and Crestron
There are many tutorials available for HA, so I will not go into detail on how to use the platform here. Instead, I’m going to focus on helping Crestron programmers/integrators understand how to connect HA with a Crestron system, so they can integrate all the different smart home IoT devices that HA works with into a Crestron system. Software developed by Nick Pope, and later enhanced by Georges Khalil, provides this functionality.
Nick Pope’s original software can be found on GitHub at:
https://github.com/npope/home-assistant-crestron-component
Georges Khalil’s fork of Nick’s original code can be found on GitHub at:
https://github.com/georgesak/home-assistant-crestron-component
Both Nick and Georges have put a great deal of work into this project, and there is a lot of very useful information in the readme files that they have included. In spite of their efforts, however, there is still a significant learning curve. That’s why I will spend the remainder of this article focusing on making the integration process easier.
I also want to personally thank Georges. He showed infinite patience in answering all my questions about HA in general and the process of integrating HA with Crestron.
The basic process of installing the Crestron-HA integration driver is as follows:
- The first thing you will need to do to install the Crestron-HA integration driver from Georges GitHub is to install the Samba share add-on onto your HA Green. The Samba share add-on allows you to connect to your HA Green using Windows File Explorer. Using File Explorer makes it easy to copy code onto the HA Green, access the configuration files you need to edit, and more. Using your browser connected to your HA Green system, or the HA app, just go to Settings->Add-ons and press the Add-on Store button. Click on the Samba share tile and complete the installation. Read through the brief documentation so you can set the options properly.
- Second you will want to open file manager and enter the following in its address bar “\\homeassistant\”. Next enter the username and password you added to the Samba share add-on configuration. Now you will see the file structure of your HA Green.
- Go to the config folder and create a subfolder named “custom_components”. Next create a subfolder to “custom_components” named “crestron”. Copy all the code from Georges GitHub folder “custom_components/Crestron” into this folder on your HA Green.
- Go back to the “config” folder on the HA Green and locate the file “configuration.yaml”. This is the file you will need to edit to make this all work. According to the website Red Hat, “YAML is a human-readable data serialization language that is often used for writing configuration files.”
configuration.yaml
When I wrote the driver to integrate a Hubitat Elevation hub with a Crestron system (the article I wrote on that project can be found here), I took the approach of leveraging the built-in Maker API application on the Hubitat and developed custom code on the Crestron system to interface with it. Nick Pope took the opposite approach. Nick’s implementation uses custom code running on HA to communicate with a SimplWindows XSIG symbol connected to a TCP/IP Client symbol on a Crestron system.
The bridge that defines how information is passed between HA, and the XSIG symbol is yaml code that you will add to the configuration.yaml file. Below is a short snippet from my configuration.yaml file.
crestron:
port: 9000
to_joins:
# joins for switch feedback
– join: d12
entity_id: switch.smart_plug_switch
# joins for lock feedback
– join: d15
value_template: “{{ is_state(‘lock.aqara_smart_lock_u200_lock’, ‘locked’) }}”
# joins for WeatherFlow Tempest Data
– join: a1
entity_id: sensor.st_00113935_temperature
– join: s2
entity_id: sensor.st_00113935_temperature
attribute: unit_of_measurement
from_joins:
# joins for switch control
– join: d10
script:
service: switch.turn_on
target:
entity_id: switch.smart_plug_switch
– join: d11
script:
service: switch.turn_off
target:
entity_id: switch.smart_plug_switch
# joins for lock control
– join: d14
script:
service: lock.lock
target:
entity_id: lock.aqara_smart_lock_u200_lock
– join: d15
script:
service: lock.unlock
target:
entity_id: lock.aqara_smart_lock_u200_lock
I integrated a Matter-compatible Linkind smart plug, Matter-compatible Aqara lock, and a WeatherFlow Tempest Smart Weather System with my HA Green for this article. The following yaml entries in the configuration.yaml file allow:
- Digital signals on joins 10 and 11 of an XSIG to turn on/off the smart plug.
- Feedback on the state of the smart plug is passed back to the Crestron system on digital join 12.
- Digital signals on joins 14 and 15 of an XSIG to lock/unlock the smart lock
- Feedback on the state of the smart lock is passed back to the Crestron system on digital join 15. This requires some additional yaml code to translate the state of the smart lock into a Boolean that is compatible with a digital join
- The outdoor temperature is communicated through analog join 1 of an XSIG to the Crestron system
- The temperature value units (degrees Fahrenheit) are communicated through serial join 2 of an XSIG to the Crestron system.
Three important points to note are:
- The port entry on the second line of the YAML code defines the port for communications between the two systems. This must match the port parameter on the SimplWindows TCP/IP Client symbol.
- Indentation is very important in yaml. If the indentation is not correct it will not be accepted by the HA Green system.
- When you transfer text from HA to the Crestron system, you need to specify the join number with an “s” and when transferring integer values, you need to specify the join number with an “a”. You need to do this even though they will be communicated to an analog join on the XSIG symbol. Trying to send text with an “a” in front of the join number specified in YAML will cause the TCP/IP symbol to go into an endless loop of disconnecting and reconnecting to the HA system. (Don’t ask me how I know this.)
After editing your configuration.yaml file with your text editor of choice, you need to validate that your changes are OK. You can do this by going to Developer Tools->YAML and pressing the “CHECK CONFIGURATION” option in the “Check and restart” tile. Once you have made sure that your YAML file will be accepted by HA, you can restart your HA processor to load the file by pressing the “RESTART” button in this same tile.
Entities and Services
Key features of the above YAML code are the entities that will be controlled and the services that will be called to control them or provide feedback. First, when writing YAML code, you will need to find out what the entity_id is of the smart home device connected to your HA system that you want to integrate with your Crestron system. This can be found through the Home Assistant UI in developer tools->STATES. There you can find a list of all your devices. This list includes the entity_id and attributes of the entity. A device’s attributes will include the device’s friendly name that you have assigned to it and possibly the unit of measurement associated with the entity’s numeric value.
To find the services available for a particular device type, you go to Developer tools->Services. There you can type in the device type you want (such as switch, lock, or sensor) and it will list the available services. For example, for a switch the available services are turn_on, turn_off, and toggle.
Crestron Programming
The SimplWindows XSIG symbol is the original symbol Crestron provided for inter-systems communications. It, and the TCP/IP Client symbol, can even be found on a Crestron 2-Series processor. There are a few idiosyncrasies to be aware of with this symbol.
First, you need to know that the XSIG symbol with analog joins can also be used to transfer text strings in addition to analog numeric values.
Second, the XSIG symbol begins with analog joins, and these are followed by digital joins. If you expand the symbol to include five analog joins you must add 5 to the digital join number displayed. For this reason, it is best to use two XSIG symbols in your SimplWindows program. One XSIG symbol is for analog and serial information. The second XSIG symbol is for digital information. Both symbols can be connected to the same TCP/IP Client symbol.
Finally, for signals to propagate properly, you need to set the option parameter on the XSIG symbol with digital joins to 1d and the option parameter on the XSIG symbol with analog/serial joins to 2d.
I have included an example SimplWindows program and associated configuration.yaml file on my GitHub that includes the switch, lock, and WeatherFlow Tempest example. You can find that here https://github.com/jbasen/Crestron-Home-Assistant-Integration-Example/tree/main
Sharing Devices Connected to a Crestron System with HA
In addition to supporting the integration of smart home IoT devices connected to an HA system with a Crestron system, driver from Nick and Georges supports the integration of the following devices connected to a Crestron system with an HA system:
- Lights
- Thermostat
- Shades
- Read-Only Digital Join (Binary Sensor)
- Read-Only Analog Join (Analog Sensor)
- Read-Write Digital Join (Switch)
- Multi-Zone A/V Switcher
Since there is quite a bit of documentation on the integration of these devices with an HA system on Nick’s GitHub site. And, because this article is focused on the use of an HA Green smart home hub as a gateway for smart home IoT devices to be leveraged in a Crestron system, I’m not going to include detailed information on doing that in this article. I just want to make people aware of the support included in Nick’s and Georges’ driver code for it.
Hubitat vs. Home Assistant
Each of these platforms has advantages and disadvantages as a smart home IoT gateway for a Crestron system:
- Both perform all processing locally and don’t require an active internet connection
- Alexa and Google Home voice assistant integration requires a subscription for HA while it is free for the Hubitat. You may not consider this to be an issue because these voice assistants can be integrated for free with a Crestron system. However, some IoT device manufacturers have implemented integration directly with these voice assistants and don’t support integration with either HA, the Hubitat, or directly with a Crestron system. So, by using routines on the voice assistant you can control these devices and the routines can be triggered by HA, the Hubitat, but not directly by a Crestron system. Also, you can use HA or a Hubitat to trigger announcements on a voice assistant, which again isn’t supported by Crestron’s direct integration. For these reasons the monthly subscription to integrate Alexa and Google Home with HA may be an issue for you.
- HA has many more smart home IoT device integrations than Hubitat
- After trying HA Green and having used a Hubitat, my personal opinion is that the Hubitat is easier to work with as a gateway for integrating smart home IoT devices with a Crestron system because there isn’t any YAML programming required with the Hubitat.
- If you are going to do more than just use HA as a gateway for integrating smart home IoT devices with a Crestron system, then it has more powerful automation tools than are available on a Hubitat.
Conclusions
HA is a stable and robust smart home platform that includes more than 1000 built-in integrations. The HA Green smart home hub makes it reasonably easy for a Crestron programmer to leverage HA as a gateway to integrate IoT smart home devices and services with a Crestron system.
However, if you need to integrate with Alexa or Google Home — whether because a device you wish to integrate with a Crestron system is only compatible with these platforms or because you want to use them for voice announcements — you will need to pay a monthly subscription fee for this integration unless you have strong technical skills. In this case, the Hubitat Elevation hub may be a better choice for integration of smart Home IoT devices with a Crestron system or you may simply want to use both an HA Green hub and a Hubitat Elevation hub, and leverage the best features of each platform as their combined cost is still cheap compared the cost of Crestron components.


