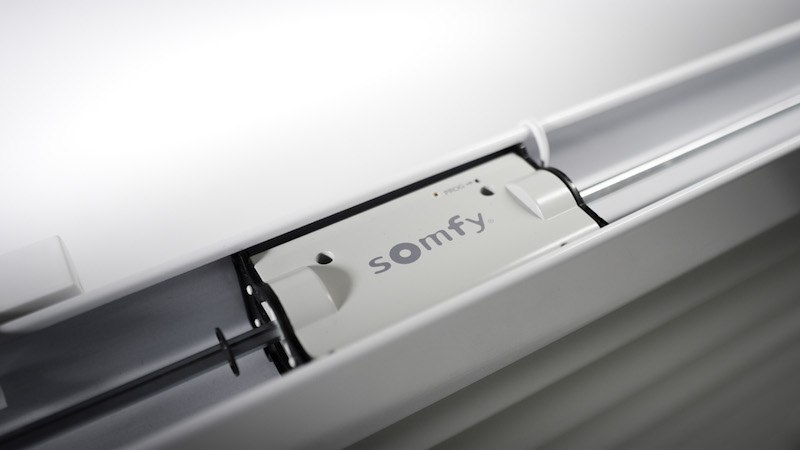
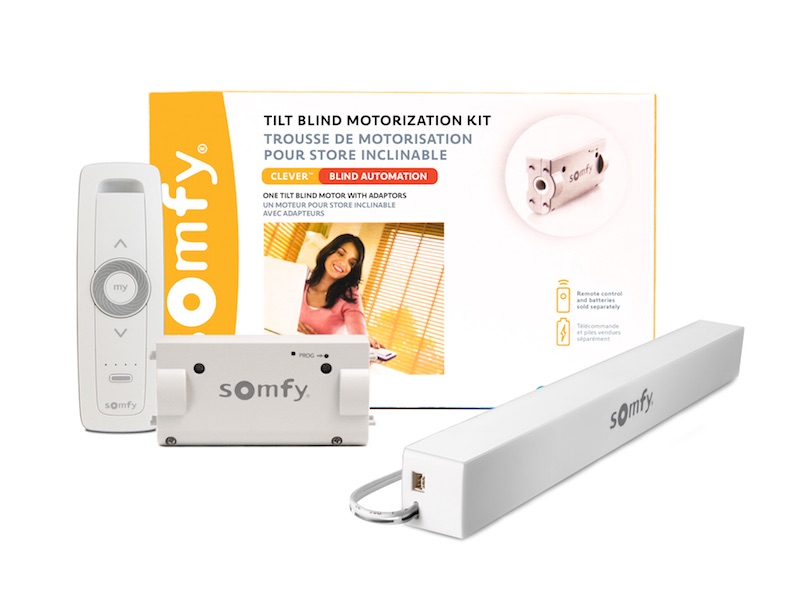
The Somfy Clever Tilt Motor enables homeowners to motorize their existing 2-inch to 2.5-inch blinds into their smart home.
The product comes packaged with seven adapters for connecting the drive motor to a blind’s tilt rod, three sets of adapters for securing the drive motor in a blind’s head rail, and a detailed instruction manual.
Related: Somfy PoE Touch Panel Room Controller Designed to Improve User Experience
There are two different battery packs for powering the system. First is a rechargeable lithium-ion battery pack. Second is a reloadable battery tube that holds eight AA batteries. Somfy also offers a handheld remote control. The above can all be purchased together in kits for motorizing between one and four shades.
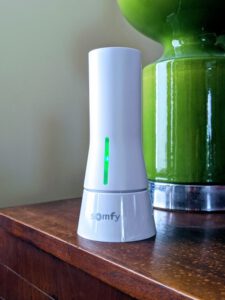
The Somfy Clever Tilt Motor can optionally be paired with the Somfy TaHoma Gateway. This device provides smart phone control with the free Somfy TaHoma app, integration with voice assistants, and integration with a wide variety of smart home platforms.
Somfy and Potential Shades and Screens Automation
Somfy was founded in 1969 and is now one the world’s largest manufacturer of motors for interior window coverings and exterior solar protections. Today, Somfy has more than 500 engineers, and their research and development center has filed more than 2,000 patents.
Automating window screens, awnings, blinds, and drapes, in a home can add real value to the homeowner. As much as 20 percent of summer heat enters a home as sunlight shining through windows.
Covering windows with insulated drapes and shades can minimize this heat gain. However, leaving your home eternally in darkness doesn’t make sense either. Using motorized shades/drapes that can be programmed to close when the sun is directly shining through a window, and open when it isn’t, can optimize energy savings. Not only will this minimize the impact of solar gain from the sun on the electricity required to run your air conditioning but opening the shades/drapes when the sun isn’t shining directly through a window provides light in the home. This minimizes the need for turning on electrical lights during the day; a technique called daylight harvesting.
For Crestron programmers, I have written code that tracks the angle and elevation of the sun and fully automates the operation of motorized shades/drapes. The code can be downloaded from my GitHub.
Exterior screens, like blinds, shades, and drapes, can protect a home from heat gain from the sun shining through windows. The same automation techniques used for blinds, shades, and drapes can be applied to exterior screens. In addition, exterior screens are subject to damage during storms so integration with a smart weather station can be used to retract exterior screens during a storm.
Motorized insect screens can also be used to enclose a roofed in outdoor space. I developed a Crestron system for a home with a large outdoor pool house. The pool house included an outdoor kitchen, dining space, lounge area, music, and TV. Two entire walls of the pool house could be opened by sliding aside glass panels for three-season living.
When the glass panels were moved aside to open the interior space to the outside, large motorized screens could be lowered to protect the space from insects. The motorized screens would have been very expensive to replace so they were integrated with a smart weather station. If the weather station detected high winds, which could carry debris that would damage the screens, the screens would automatically be retracted.
Awnings can also help shade a home from the heat of the sun during the summer. A motorized awning can automatically be extended. On the other hand, inclement weather and wind can damage an awning. Integration with a smart weather station can be used to retract a motorized owning during storms.
Finally, motorized rolling shutters can provide added security for a home and protect windows from inclement weather. Shutters can be automatically deployed when a home isn’t occupied or can be deployed when a smart weather station detects a storm.
Hands On with the Somfy Clever Tilt Motor
Somfy provided me with a Clever Tilt Motor, lithium-ion battery pack, remote control, and TaHoma gateway to evaluate for this article.
When you open the box and examine the Somfy Clever Tilt Motor you immediately realize that this product is different than the typical smart home product for the consumer market. For example, instead of a plastic enclosure for the motor there is a very solidly constructed metal case.
In addition, the instructions are very detailed and clearly written. And, if the instructions aren’t enough to help a user install the product, Somfy has invested in the development of YouTube videos that demonstrate exactly how to perform the installation.
However, it is important that before you purchase a Somfy Clever Tilt Motor to motorize you blinds that you validate that it is compatible with your blinds. Somfy offers a compatibility tool on the website that walks you through the process.
Installation of the Somfy Clever Tilt Motor was surprisingly simple. However, if you have the lithium-ion battery pack for your Somfy Clever Tilt Blind Motor, I suggest that you start by fully charging the battery pack. It will take a number of hours to charge, and this will save you from waiting around after you have finished the physical installation before you can proceed.
Next, take the blinds down off the wall and remove the end caps from both ends of the blind’s headrail.
As stated earlier, the Somfy Clever Tilt Motor ships with three sets of adaptors for mounting the motor in the headrail. You next need to choose the adapters that provide the best fit. There is a diagram in the instruction manual to help with this process
As stated earlier, the Somfy Clever Tilt Motor also ships with seven tilt rod adapters. You next need to choose the adapter that matches the cross section of your blind’s tilt rod (square, hexagonal, etc.)
Next, slide the tilt rod in your blind away from the current tilt mechanism and remove the tilt mechanism. Note: you will either have to remove the current tilt wand or cut the tilt chords to remove the tilt mechanism.
Now, insert the tilt rod adapter from step four into the motor, snap the adapters from step three onto each end of the motor, slide the motor into the headrail and the tilt rod through the tilt rod adapter, replace the headrail end caps. Now, re-install the blinds on the wall.
Next, insert your fully charged lithium-ion battery or new batteries in the battery tube depending on which battery you have. Then, plug the battery into the motor and mount the battery to the window frame, wall, or headrail using the included clips.
Two sets of clips were included with the lithium-ion battery that was included with the Somfy Clever Tilt supplied to me. The first set of clips is for mounting the battery to the wall or window frame using screws and wall anchors (also included). The second set allowed the battery to be clipped to the blind’s headrail.
Once the physical installation is complete and the battery is plugged in, the next step is to program the upward and downward tilt limits using the Somfy remote control. I won’t go through all the details of doing this as it is well documented in the instruction manual that comes with the Somfy Clever Tilt Motor. The instructions are clearly written. However, I will say that the sequence of buttons that need to be pressed on the remote are a bit tricky to follow. For this reason, the instructions warn you to read each step fully before starting to execute the instructions for that step.
There is also a procedure for setting a favorite tilt position that the blinds will move to whenever the “My” button on the remote is pressed.
Somfy has an excellent YouTube video that describes the entire installation process. That video can be found here.
Smart Home Integration
The Somfy Clever Tilt Motor can optionally be paired with the Somfy TaHoma Gateway. This device provides smart phone control with the free Somfy TaHoma app, enabling automatic control of blinds via programmed scheduling, whether at home or away, integration with voice assistants, and integration with a wide variety of smart home platforms. Somfy has drivers available to allow many smart home platforms to communicate with the Somfy TaHoma gateway including:
- Alarm.com
- Philips Hue
- SmartThings
- Control 4
- Crestron/Crestron Home
- Elan
- Savant
- URC
- RTI
- Brilliant
In addition, blinds outfitted with the Somfy Clever Tilt Motor and integrated with the Somfy TaHoma Gateway can be controlled through:
- Google Assistant
- Amazon Alexa
- IFTTT
- The Somfy Tahoma North America Smart Phone App
To set up the Somfy TaHoma gateway, you start by simply plugging it into a power outlet using the included power supply. Then, while the gateway boots up, you will need to download the TaHoma North America app. Once the app is installed on your smart phone, it will walk you through the process of setting up the gateway. The process was typical of what I have seen with other IoT devices and includes activating the gateway, creating an account, accepting the Somfy terms and conditions, and confirming your email address.
Next, after logging into the app, there is a second procedure that the app will walk you through to connect the Somfy TaHoma gateway to your WiFi network by providing your Wi-Fi password and scanning the QR code on the TaHoma gateway. It then took several minutes before the TaHoma gateway’s LED indicator turned green signifying that it was both connected to my Wi-Fi network and to the Somfy cloud.
With the TaHoma gateway fully configured I could now link my shade outfitted with the Somfy Clever Tilt Blind Motor to it. This was an easy process. First, from the menu shown by pressing “…” on the app’s lower menu bar select “My Products.” Next press the “+” in the upper right corner of the screen to add a new Somfy product to the TaHoma gateway.
To add a blind outfitted with a Somfy Clever Tilt motor you next need to select that you are adding an RTS shade and then select Interior Venetian Blind. Next, enter a name for the shade. Then, press and hold the program button on the back of your Somfy remote until the shade jogs. A screen is then displayed in the app with buttons to control your shade. At this point you need to test that they control your shade. Then you are done.
Other options available on the “My Products” page are to select this shade as a favorite so it will appear on the app’s “favorites” page, add the shade to a group so it can be controlled with other shades, and to delete the shade from your TaHoma gateway.
The app also allows you to create scenes where a device can be triggered to take a specific action at a specific time, at up to 1 hour before/after sunrise, or at up to one hour before/after sunset. There is also the option to choose which days of the week this will occur on.
To integrate the TaHoma Gateway with a third-party smart home platform, you need to select “Third Party Integration” from the menu shown by pressing “…” on the app’s lower menu bar. Then, select the platform you want to integrate with. For testing, I chose Amazon Alexa. In this case the integration is actually performed from the Alexa app where you need to log in to your Somfy account using your email address and Somfy password. Once the accounts are linked you simply need to say “Alexa, discover devices.”
With the shade linked you can use the following voice commands to open/close the blind:
- “Alexa, open the [blind name assigned by you to your blind in the Somfy Tahoma North America smart phone app]”
- “Alexa, close the [blind name assigned by you to your blind in the Somfy Tahoma North America smart phone app]”
Scenes and groups that are defined in the Somfy Tahoma North America Smart Phone App can also be triggered with voice commands.
- “Alexa, turn on [scene name assigned by you to your blind in the Somfy Tahoma North America smart phone app]”
- “Alexa, open the [group name assigned by you to your blind in the Somfy Tahoma North America smart phone app]”
In addition, a scene can be used to trigger the blind to move to the position assigned to the “My” button on the Somfy remote control.
Finally, Alexa routines can also be used to trigger the blind to open, close, or to trigger a scene or group
Somfy Clever Tilt Motor Limitations
One limitation that I ran into was that Somfy only supports a single close position for blinds. The reality is that blinds have two close positions. The first close position is with the slats tilted all the way upward. The second close position is with the slats tilted all the way downward. This leaves users with two options.
One option is to define the close position either with the slats slanted fully upwards or the slats slanted fully downward. Then, you can define the open position with the slats horizontal. This makes logical sense and maps the open/close positioning of the slats to a voice assistant and other third-party integrations. However, it eliminates access to 50% of the possible slat positions because, for example, if “close” is defined as the slats being fully tilted upwards and open as the slats positioned horizontally, then you can’t position the slats anywhere beyond the open position with the slats facing downward.
The second alternative is to set the open position as the slats facing fully upward (even though this closes the blinds) and the close position with the slats facing fully downward (again closing the blinds). Then save the blinds in a horizontal position (fully open) under the “My” button. This allows the blinds to be positioned anywhere between fully closed with the slats facing upward and fully closed with the slats facing downward. However, integration with third-party systems, and even when using the TaHoma app, becomes somewhat confusing. This is because telling the blinds to open will send them to a position where they are closed. To open the blinds, you have to trigger a scene that will send the blinds to the position saved under the “My” button.
Second, the Somfy Clever Tilt Blind Motor only allows a single random position (the one saved under the “My” button on the Somfy remote control) to be triggered through a command from a voice assistant or programmatically through a third-party smart home integration driver.
The Somfy remote control, the Somfy TaHoma App, and more advanced smart home integrations do allow you to manually jog a blind to any position using up/down buttons or up/down third-party driver inputs. However, there isn’t the ability to send a command that positions the blinds to, for example, 25% open. In addition, if you have followed option 2 shown above, then the “My” button has been used to save the slats horizontal open position and there is no other alternative for saving a favorite position.
If Somfy added a default close position that would be triggered when a close command was sent from a third-party integration, this would allow the open command to position the slats horizontally and allow the position of the slats in a favorite position to be saved under the “My” button. This approach would allow third-party integrations to be more intuitively triggered, provide access to all possible shade positions, and eliminate the need to save the open position under the “My” button.
Summary
The Somfy Clever Tilt Blind Motor is a high-quality product, which was made very easy to install. It includes adapters for a wide range of blinds.
The Somfy Clever Tilt Blind Motor, through the Somfy TaHoma gateway, also integrates with a wide range of third-party smart home platforms and voice assistants, includes the platforms used by professional smart home integrators and those available to consumers.
If the two limitations described above don’t bother you, then the Somfy Clever Tilt Blind Motor is a good choice for motorizing existing blinds.


