When the opportunity to review the DreameBot D10 Plus auto-empty robot vacuum and mop come along, I felt like I was already pretty late to the whole robot vacuum trend. With mass availability online and at retail (and even my brother Chris having one for several years) it just felt like I was more “late majority” than “early adopter” with the technology.
The thing is, despite the evolution of the category and the growing number of brands competing in it, we’re still very much on the early side of consumer adoption of robot vacuums. There just aren’t as many people buying them as you would think.
I imagine my own hesitancy to embrace the category aligns pretty closely with the slow adoption of the robot vacuum. The price point is still relatively high (although quite comparable to a high-quality upright vacuums) yet they seem to be limited in what they can accomplish without supplemental cleaning devices and set up focus. Then there’s that whole thing about adding extra cameras in our homes and related privacy concerns.
That’s why I was so encouraged by the prospect of reviewing the DreameBot D10 Plus from the Chinese manufacturer Dreametech. Not only did it allay the privacy issue by employing LiDAR tech instead of video camera navigation, but it also promised auto-emptying, mopping capability, and 4,000Pa suction power with automatic power adjustment for carpet and hard floors.
Setting up the DreameBot D10 Plus
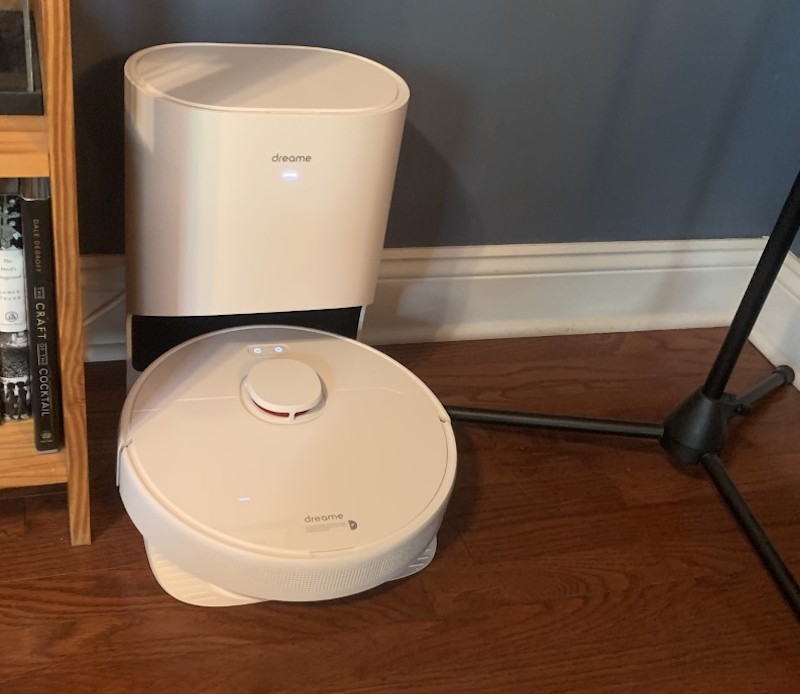
The DreameBot D10 Plus comes with a standard disc-shaped robot that docks into an auto-empty base that, altogether, looks a little bit like a tiny toilet. Finding the proper location for the unit was probably the toughest part of this review, as it isn’t the type of tech that tucks easily away out of sight in a modest-sized home like mine (3,000 square feet). I cleared some space in our laundry room/garage entrance area underneath a utility sink. I knew the challenge would be keeping abandoned backpacks and discarded footwear out of the robot’s path, but it was the best location I could find.
Once the base was plugged into the electrical outlet and robot vacuum docked, I allowed the unit to fully charge for 24 hours. The next day, I downloaded the Mi Home app and linked up the device.
Before sending the robot out to map the main floor of my house, I made sure to pick up dog toys and random footwear. I also pushed in dining chairs and tucked away lamp cords. Mapping took about 50 minutes. I learned throughout the process that my home office shag rug is too deep to be vacuumed by the DreameBot D10 Plus, so I created a No-Go Zone on the floorplan map within the app. It was an easy step, though just a bit harder to do with think fingers on a tiny screen. Other No-Go Zones were added later, such as behind my sofa where the DreameBot D10 Plus got hung up on an extension cord too many times, and the formal dining room which is rarely used so a waste of battery to vacuum every week.
Once the mapping was complete, I allowed the DreameBot D10 Plus to return to its charging base to reload for a bit before its first vacuuming run.
First Vacuuming Run
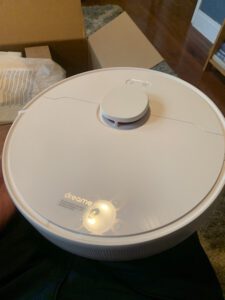
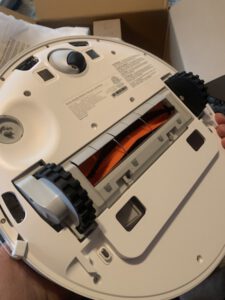
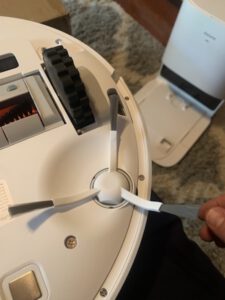
The DreameBot D10 Plus followed its own map very precisely. Although the robot cleans according to its memorized path, the unit’s LiDAR laser still registers obstructions, spinning, turning, and pivoting to avoid contact. The spinning sidebrush does a solid job of collecting dust and debris from along walls up under the DreameBot D10 Plus where the rotating main brush and suction can vacuum it up.
Initially, I set the DreameBot D10 Plus to run once a week, early on Wednesday mornings. However, when the Carpet Boost setting would be triggered, the noise was akin to someone blow drying their hair, which was annoying enough at that early hour to convince me to change the automation to early Sunday nights, instead. To be fair, the higher suction isn’t any louder than an upright vacuum, but having that noise come from an autonomous device, just makes it a bit more annoying to my family.
Within my home are three women with long hair, an old guy with not much hair, and a dog who sheds and tears up her toys. There’s a lot to clean over the span of a week, and the DreameBot D10 Plus had done an excellent job eliminating the dust bunnies and fur balls that can develop along baseboards and on the hardwood around area rugs. Even the carpet vacuuming seems comparable to the quality of our new upright vacuum.
The Mopping Feature
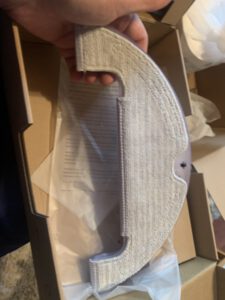
While I’m fully willing to endorse the vacuuming capabilities of the DreameBot D10 Plus, I’m just a little enthusiastic about the robot’s ability to mop. The unit comes with a mopping module, which is a half-moon shaped plastic reservoir that you fill with water. A mop pad must be dampened and wrung out, then it is attached to the module, and the whole thing is clipped into the front end of the DreameBot D10 Plus.
The cool thing is that DreameBot D10 Plus automatically senses the attachment and switches to the mopping setting in the app, providing a verbal notification and update on your phone. When the mop is attached, a different version of the memorized floorplan appears, which, for me, required different No-Go Zones. For instance, you don’t want the robot to mop on top of carpets or rugs, obviously, so those need to be blocked out. The challenge here is that normally I would want to mop on the hardwoods around the edges of rugs, but it’s really tough to do with the somewhat imprecise mapping tool and because the wet “mop” would have to drag across a rug to get to certain corners of the hardwood.
The other limitation of the DreameBot D10 Plus mopping function is that you are advised to use only clean water in the module, with no cleaning detergent or disinfectants of any kind. To me, mopping with just water is OK for clearing footprints, etc., but it’s not what I would consider “cleaning” per se. So, while I still attach the mop module once a week and let it run its course, I also supplement the robot’s mopping with a Swiffer Wet Jet in those more challenging areas.
At the end of the mopping cycle, the DreameBot D10 Plus returns to base and a voice tells you that the attachment is still “attached.” You then manually disconnect it and empty it and clean the mop pad.
Speaking of “voice,” you can connect the robot to your Amazon Alexa smart speaker, but I found it unnecessary to talk to it because the app and physical buttons for Pause and “return to base” on top of the robot worked well enough without an additional voice feature.
Maintenance
One the cleverer touches from the designers of the DreameBot D10 Plus is a little brush/cutter cleaning tool that is mounted under the top lid of the robot. Think of it like one of those razorblade style letter openers from the 1990s. This device has an angled blade inside a protective plastic guide, and a little brush on the other end.
Like on any vacuum, long hairs and threads can easily wrap around the roller, even in a short amount of time, and the cutter is a great way to perform regular maintenance on the brush. Similarly, the sidebrush also gets tangled from time to time. In fact, when it’s especially clogged, the robot will stop and report, by voice, the need to remove the obstruction, as well as popping up as a message on your phone. This happened to me when my wife’s business meeting badge lanyard was on the floor under her desk and got wound around the sidebrush.
Self-Emptying Vacuum
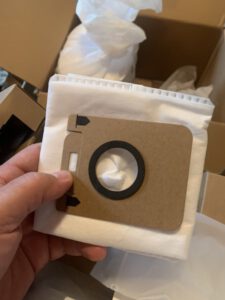
Another big selling point for the DreameBot D10 Plus is that once a cleaning cycle is complete, the robot will announce that it’s returning to its base, and when it has docked, announces that it is emptying into the collection bag inside the base. DreameBot D10 Plus comes with two collection bags, which fit neatly into a mounting mechanism that automatically closes the bag when it is removed. Replacement bags are $19.99 for a set of three on Amazon. It’s recommended that you replace the bag every four to six weeks, which I found to be accurate.
Although I grown accustomed to bagless upright vacuums, no vacuum operates maintenance-free, so I think the operation of the DreameBot D10 Plus measured up to my expectations.
Final Thoughts
I would consider myself a reluctant robot vacuum customer. Unlike most normal people, I don’t mind vacuuming the house once a week. I’m not quite at the age when I feel that I need to turn that process over to a robot. That being said, the DreameBot D10 Plus has proved to be an excellent supplemental housecleaning “partner,” helping me maintain high-traffic areas like the kitchen and garage entrance where outdoor debris, crumbs, and pet hair tend to accumulate more quickly.
While I know that the DreameBot D10 Plus can map multiple floors of a house, the amount of wall-to-wall, medium pile carpeting on the top level of our house, combined with messiness of bedrooms occupied by teenagers, makes the robot vacuum a less efficient option there. I will continue to clean those areas with an upright vacuum and leave most of the main level to the robot. I do wish it handled the heavy shag of my office area rug better, but I will continue to tackle that my hand, as well.
At $499 MSRP on Amazon, the DreameBot D10 Plus robot vacuum is priced similarly to a high-quality upright vacuum like a Dyson or Shark, and it’s much easier to carry up and down stairs. The use of LiDAR technology also makes this particular brand not only less of a security concern but also more accurate, mostly avoiding contact with walls, doors, and furniture.
Overall, I would highly recommend the DreameBot D10 Plus to a first-time robot vacuum owner, with the caveat that all technology requires some level of maintenance and proper initial setup. Is it a full replacement for an upright vacuum and mop? Probably not, but your home might provide a better use case than mine.


