There are a variety of user interfaces for controlling a smart home. Some of the most common methods are by using individual smart phone apps provided by manufacturers, an integrated app that ties together smart devices, handheld remote controls, dedicated touch panels, wall-mounted keypads, or voice control. All of these options have their advantages and disadvantages, but I was convinced that I could find an alternative user interface for my smart home, which is how this article came together.
Wireless Keypads as an Alternative User Interface
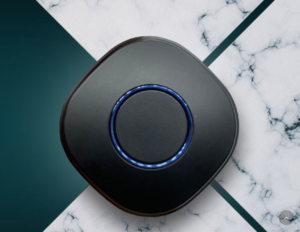
I really like wireless keypad user interfaces and use them in my own home. Battery-operated models are great to place on a nightstand, table, desk, work bench, etc. and programmed to perform a few dedicated functions.
For example, Shelly makes a basic single-button, Wi-Fi keypad. The Shelly Button 1 is rechargeable, so you never have to worry about not having the correct battery on hand if it runs out of power. In addition, it can be integrated with a wide variety of smart home platforms. I’ve written a free driver to integrate Shelly devices with a Crestron smart home system, which can be downloaded from my GitHub here.
The Shelly Button 1 can report a single press, double press, triple press, and press-hold events. So, this single button can perform four different actions in a smart home.
Aeotec also makes a very small, four-button, Z-Wave, rechargeable wireless keypad called the NanoMote Quad. The three outer buttons on the keypad each have small raised dimples, making it easy to use in the dark. In addition, each button supports both press and press-hold functions.
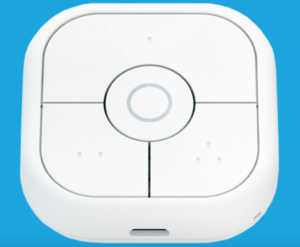
Aeotec has built a child lock feature into the NamoMote Quad. It is enabled, and disabled, by pressing and holding one of the buttons for 10 seconds. I tested a NanoMote Quad with my Hubitat Elevation hub. The NanoMote Quad is on the list of Hubitat compatible devices and it worked seamlessly. Installation was very simple. You just install the battery, double click the button, the LED indicator will begin to flash, and the hub is placed in pairing mode.
MOES manufactures battery powered Zigbee keypads for the Tuya smart home platform. However, people have written drivers to integrate these keypads into other smart home ecosystems.
I’ve personally tested a community-developed driver for the Hubitat Elevation hub, and it works perfectly. The MOES Scene Switch is available in black, white, and gray. In addition, it can be purchased with one, two, three, or four buttons. Each button supports single-press, double-press, and press-hold events. So, a four-button keypad supports up to 12 programmable events. The Scene Switch is shipped with two strips of double-sided tape, so it can optionally be mounted on a wall.
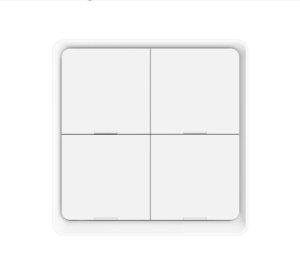
Unlike the Shelly and Aeotec products, the MOES Scene Switch buttons are quite large — approximately 1.5 inches square on the four-button keypad. This provides plenty of room to apply a label to the button that describes its function, making it easier to use in a large home. So, while that isn’t as good a solution as a custom-engraved button in a keypad from a professional smart home manufacturer, it does provide a user-friendly, DIY solution.
Installation of the MOES Scene Switch was very easy. First, I added the custom driver code to the Hubitat Elevation Hub. Next, I chose to add a Zigbee device to the hub. Then, I pressed and held one of the buttons on the Scene Switch to put it into acquire mode. Finally, I put the Hubitat Elevation hub into acquire mode and the Scene Switch was almost immediately recognized by the hub. I then tested the operation of the Scene Switch, and the button press events were properly recognized.
Instead of mounting the Scene Switch on a wall, I wanted to use it on a tabletop. The plastic back of the case provides too slippery a surface, so I added some small, self-adhesive bumpers from the hardware store to the bottom of the case to address the problem. his was inexpensive and worked very well.
Finally, I used the Crestron-Hubitat driver code that I wrote (available for download from my GitHub here) and integrated the Scene Switch with the Crestron processor that runs my home.
Tyba Turn 2
The Tyba Turn 2 is a 3.25-inch diameter Wi-Fi smart home user interface for Crestron, Control4, and KNX smart home ecosystems. In addition, the device has a REST API so it can also be integrated with other smart home controllers.
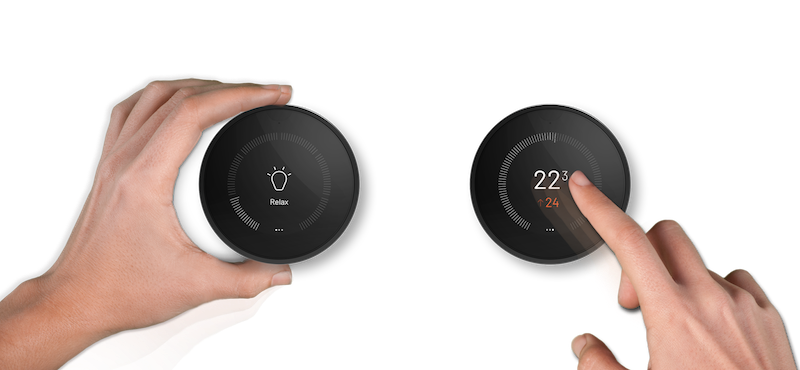
The Turn 2 has a central touch panel/display that is surrounded by a twistable ring. For example, a swipe on the touch panel can change the functionality from light control to thermostat control with the current temperature and set point displayed. The outer ring can then be twisted to move the set point up or down. The Turn 2 can be used to control lights (individual lights and scenes), climate (temperature, fan speed, modes, humidity), shades (individual shades and groups), and audio (volume, play/pause, next/previous tracks).
The Turn 2 also includes a small LED so it can be easily located in the dark, a temperature sensor, and a motion sensor that automatically wakes up the device when you approach it.
To integrate the Turn 2 with various smart home platforms requires attaching the correct bus connector to the back of the device. These include DC Power Bus Connector, which is used when the Turn 2 will be integrated over Wi-Fi using the device’s REST API. It is also used for integration with Crestron and Control4 smart home processors over IP. They also include Cresnet Bus Connector and KNX Bus Connector.
The Turn 2 also has a port on the back of the unit for connection of a USB C cable that can be used to power the device.
The Tyba Turn 2 has been designed to meet the requirements of professional integrators and homeowners who want a professionally installed smart home system. For example, the outer control ring is machined from solid metal and is available in black, silver, and bronze. In addition, Tyba offers a range of special-order alternatives, such as copper.
Tyba can also supply an optional back plate for wall mounting or a table stand. However, it is important to remember that the Tyba Turn 2 is not battery powered.
Once the Tyba Turn 2 has been connected to a power supply, you can configure it over Wi-Fi using the free Tyba smart phone app. The app is easy to use and allows you to:
- Connect the Turn 2 to your Wi-Fi network by scanning a QR code with your smart phone’s camera that is displayed on the Turn 2
- Configure all aspects of the options that will be displayed on the Turn 2’s display
- Configure settings such as whether the Turn 2 will connect with a control system through a Tyba Bus Connector, set the Turn 2’s date / time, configure whether the Turn 2 will display a clock as a screen saver, and more
Overall the Turn 2 is very easy user interface for controlling a smart home. However, there is one place where I believe the user interface could be improved. First, if you are in the mode where you will be selecting between different lighting scenes or shade scenes, as you twist the outer ring it will select each scene in order. This will cause shades to start moving as different scenes are selected or lights to turn on/off. Including a slight delay before the scene is triggered as the ring is turned would be a better solution. I spoke with Tyba about the above issue and was told that they are aware of it and have plans to address it in an upcoming software release.
I integrated the demo unit that I was provided with for this article with a Crestron smart home processor. The process was very simple and the Simpl Windows programming symbol for communicating with the Turn 2 was very well designed and easy to use. There was also a very detailed help file to go along with the programming symbol. The only suggestion I have for improvement would be to provide an example program as it would speed up the learning curve for a developer integrating the product with a homeowner’s smart home system for the first time.
I did have some trouble with Wi-Fi connectivity of my demo unit, which had been used by other people before me. Working with the people at Tyba, our best guess was that the Wi-Fi radio was either damaged during shipment or was starting to fail. Since most of my testing was done using the Tyba Cresnet Bus Connector, this was only an issue during setup.
Overall, the Tyba Turn 2 would be at home in any high-end smart home system. The display is bright and crisp. The overall fit and finish of the Turn 2 is very well done. And, the user interface, with the exception of the one idiosyncrasy I pointed out, is very well designed and easy to use.
Aqara Cube
The Aqara Cube is a small 1.75-inch, Zigbee, battery-operated user interface device that works by sensing how a user moves the Cube. It includes a six-axis sensor with an accelerometer and gyroscope to identify motion and changes in position of the device. There are events when the Cube is moved sideways, shaken, rotated, tapped twice, flipped 180 degrees, and flipped 90 degrees.
Aqara’s supported integration path for the Cube involves purchasing the Aqara Hub and then leveraging their IFTTT service. However, I have also seen community developed drivers for SmartThings and the Hubitat Elevation hub to allow for direct integration of the Cube with these platforms. I expect that there are drivers for other platforms as well.
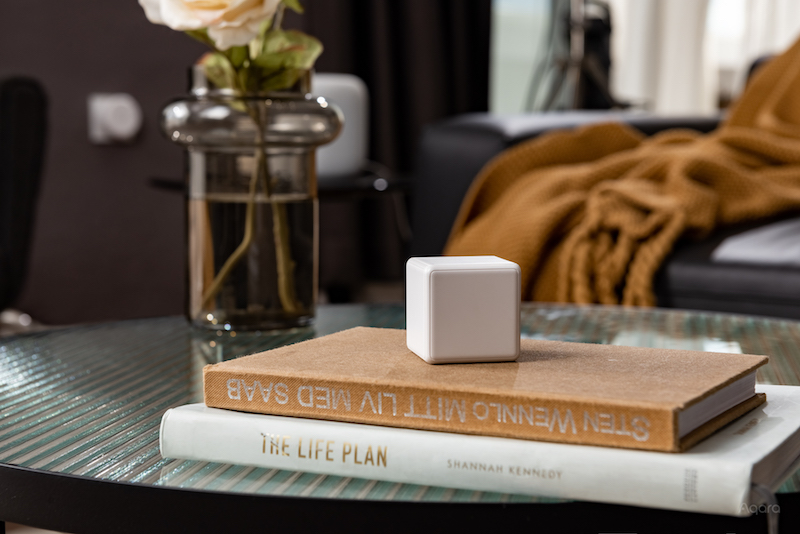
I was able to try the integration of the Aqara Cube with a Hubitat Elevation hub using the driver developed by Oh-La Labs. The driver implements the Cube as a seven-button keypad where the different events supported by the Cube show up on the Hubitat as button presses on a keypad as follows:
Button 1 Press – Shake
Button 2 Press – Flip 90
Button 3 Press – Flip 180
Button 4 Press – Slide
Button 5 Press – Knock
Button 6 Press – Rotation Left
Button 7 Press – Rotate Right
I had some challenges getting the Aqara Cube to reliably work with the Hubitat. However, after some initial hurdles, it seemed to stabilize. One exception was that I found it difficult to implement the event of knocking twice on the Cube.
The Aqara Cube would provide a reasonably secure platform for capturing user input, as a casual guest in a home is not going to know what to do with a small plastic cube that is sitting on a table.
Fibaro Swipe
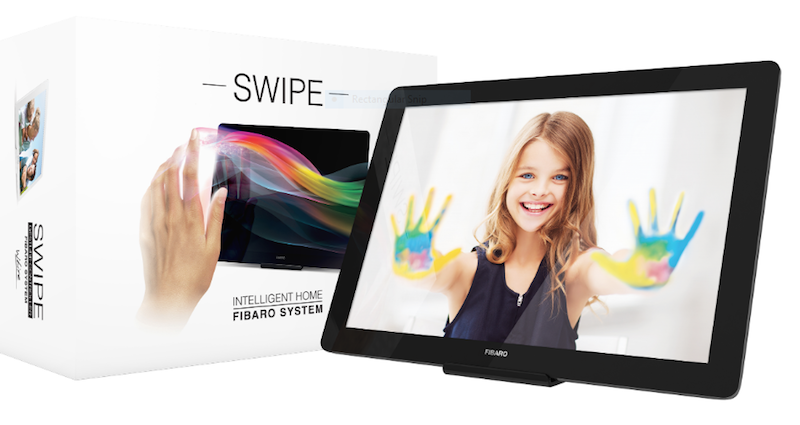
The Fibaro Swipe looks like a modern, non-digital picture frame (yes, you can print out a picture of your choice and install it in the Fibaro Swipe). However, it includes a 3D near-field motion sensor and can detect a variety of hand motions. The basic hand motions that can be detected are swiping up, down, left, and right. In addition, the Swipe can detect circular motions of spinning your hand left or right. Fibaro has a very creative and entertaining video on YouTube that demonstrates the basic operation of the Swipe
The Fibaro Swipe is a Z-Wave device that is designed to integrate with Fibaro’s line of smart home controllers. Through a Fibaro smart home controller you can trigger events when any of these basic gestures are performed or create events that are only performed when a specific sequence of gestures are detected by the Swipe.
It should be noted that incorporating a long list of events into a Fibaro Swipe, each of which would require a different sequence of gestures, would be very difficult to memorize. So, if you incorporate a Fibaro Swipe into your smart home, you will need to exercise some restraint.
The Fibaro Swipe is battery powered and can be placed on a tabletop, hung on a wall, or even hidden underneath a countertop or behind the drywall of a wall. The device’s 3D near-field motion sensing can even detect a hand swipe through a solid object. This would be ideal for a home that incorporated a minimalist interior design. For example, light switches could be totally eliminated and hand swipes, over the drywall, beside each doorway, would turn the lights in a room on/off.
This also makes the Fibaro Swipe an ideal user interface for securely communicating with a smart device. In one home that I developed a smart home system for, the homeowner incorporated special locks that were under control of the smart home system into the cabinet that held some very expensive whisky. In another client’s home, the homeowner had some very expensive designer clothing in a closet. Special locks were incorporated into that closet so nobody but her could access the clothing. In both these cases, a Fibaro Swipe could have been hidden behind the door and it would have required a special sequence of hand gestures to open it.
A community written driver has been developed to integrate the Fibaro Swipe with the SmartThings ecosystem. That driver has been ported to the Hubitat Elevation hub so the Fibaro Swipe can also be integrated into smart home system with a Hubitat hub. However, I wasn’t able to try the Fibaro Swipe myself to validate whether these drivers, or the product, worked well.
Alternative User Interface Conclusions
The traditional user interfaces for controlling a smart home system work well but all have their downsides. Smart home manufacturers have become very creative and now offer some unique, and very different, ways of controlling the devices in a smart home. Each of these has unique attributes that may make them a better fit for different areas of a smart home.


